Calman can automatically calibrate the greyscale and CMS settings on select Epson Projectors
Calman Requirements
- Calman 2022 (5.13.0.86) or higher
- Ultimate or Video Pro license required
- Supported Epson Projectors
- TW8400/TW8400W/TW9400/TW9400W/PC6050
- These models have limited support in Calman 2019
- EH-LS12000B/EH-LS11000W/CH-LS12000B/CH-LS11000W
- TW8400/TW8400W/TW9400/TW9400W/PC6050
- Serial Connection Cables
- Listed Below
Serial Connection Information
To connect the Calman calibration computer to an Epson Projector
- Connect an RS232 port on your PC or to a USB to serial converter.
- If you are using a USB to serial converter, in Windows Device Manager, under “Ports (COM & LPT),” look for a “USB Serial Port (COMx)” listing.
- Note the listed COM port (COMx) of the serial converter.
USB to RS232 Serial Converter
For connecting to an Epson Projector with a computer that does not have an RS232 port, we recommend the FTDI (US232R-10 Premium) USB to RS232 converter. Extensive testing has determined that this FTDI converter, which includes a data buffer, is the most reliable adapter to use for Calman device control.
USB Driver download for FTDI converter Or, Calman Device Driver Pack
Step 1
- From the Calman Menu in the top-left, choose Open Workflow Template and then AutoCal – Epson Projectors
- Choose your Calibration Mode
- 2-point – Will perform a 2-point white balance adjustment, as well as color temperature and gamma/luminance adjustments
- Multipoint – Will perform a multipoint greyscale adjustment, as well CMS and gamma/luminance adjustments. This is a more detailed calibration and will be focused on in this guide
Connect your Colorimeter and Pattern Generator to Calman.
- Plug your meter into a USB port on the computer and press the Find Meter button on the left
- When your meter is connected, select your display type from the dropdown (this will vary by meter)
- Connect Pattern Source to your computer.
- Click the Find Source button then select your source
- Select the 100% pattern window size
Connect to your Epson Projector for calibration
- On the Calman Display Control tab, click Find Display
- On the Find Display dialog, select Epson as the Manufacturer.
- Select Epson – Projector (RS232) as the Make
- Select the COM Port that is assigned to the connected generator (check this in Windows Device Manager).
- Click Connect on the Find Display dialog.
Calibration Targets
- The calibration options are pre-configured at:
- Colorspace: BT.709
- White Point: D65
- Gamma: Power Formula 2.35
Meter Positioning
- Position the meter on the line of sight from the main or central viewing position, pointed at the center of the screen. Place the meter far enough away from the screen to avoid reading the meter’s own shadow.
Step 2
In this step, you’ll take readings of your display before the calibration. These will be used to compare your calibration results
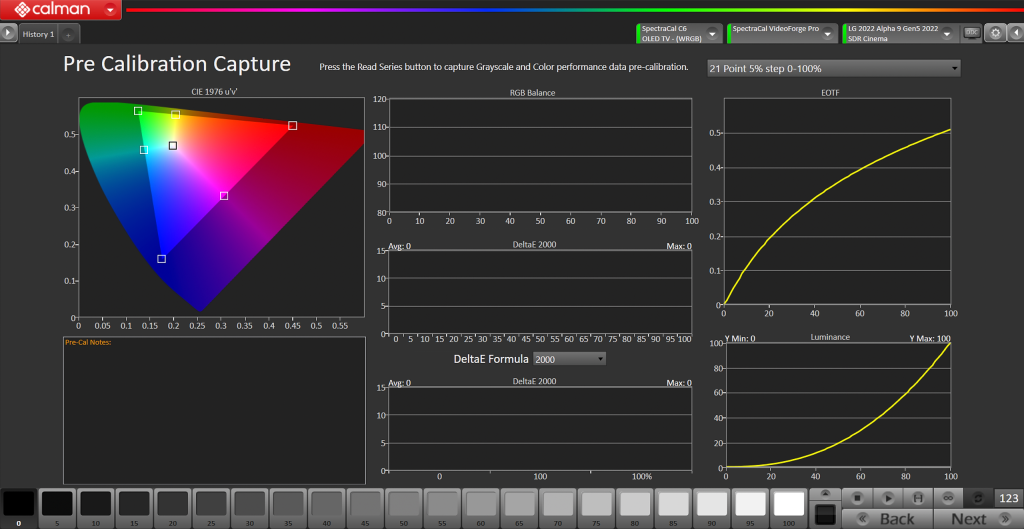
- To take Pre-Calibration Measurements click the Read Series […] button to measure the display’s grayscale and ColorChecker response
- This will provide a point of reference to compare your calibration results
Prepare Epson Projector for Calibration
- After selecting your picture mode, click the Full DDC Reset button. This resets and prepares the picture mode for calibration.
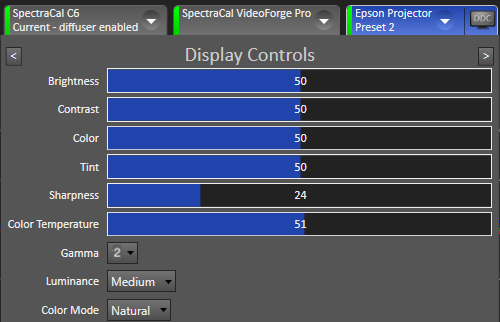
- Confirm projector settings
- From the DDC Menu, confirm the following
- Gamma – (-2)
- Luminance – Medium
- Color Mode – Natural
- From the projector on-screen display, confirm the following
- Smart Iris – OFF
- From the DDC Menu, confirm the following
Step 3
Adjust Gamma/Luminance
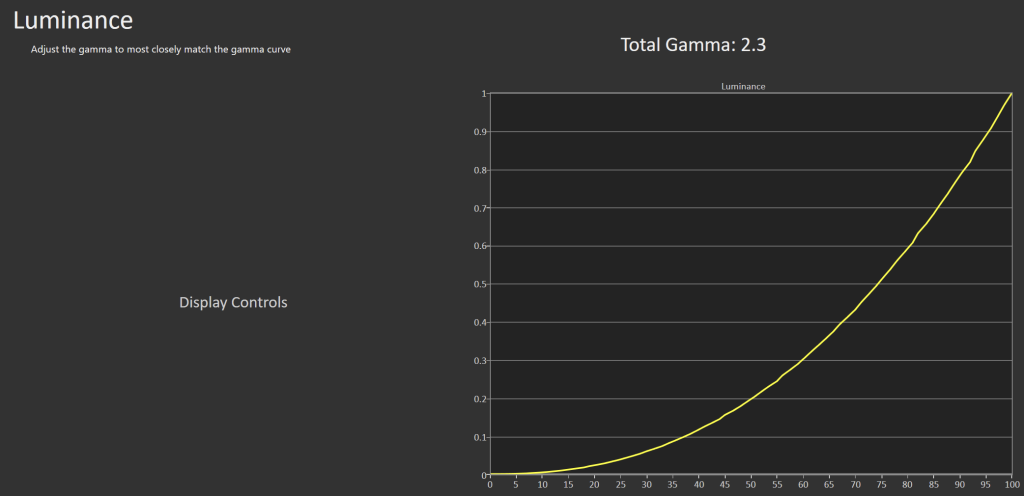
- Use the workflow controls to adjust your projectors gamma curve to best match the yellow line on the chart to the right
Step 4
Calibrate multipoint grayscale
- From the Multipoint Grayscale workflow page, click the AutoCal Button to open the AutoCal Dialog
- 11 points will be automatically selected
- Click OK to begin AutoCal
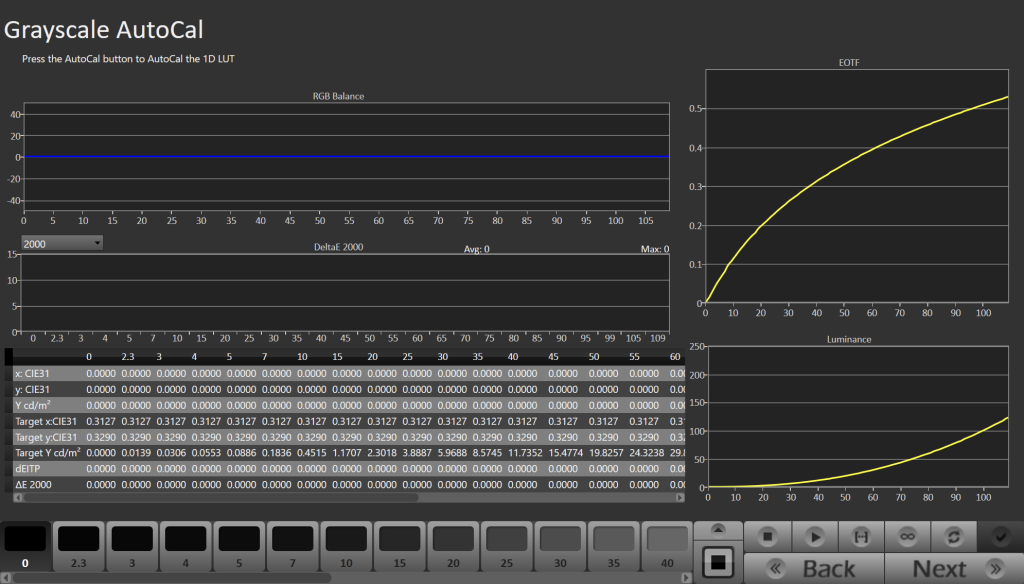
- When the AutoCal Process has been completed a summary dialog will be displayed
Step 5
- Press the AutoCal button to calibrate saturation and hue for your projector.
- For best overall color representation we recommend calibrating at 60% saturations.
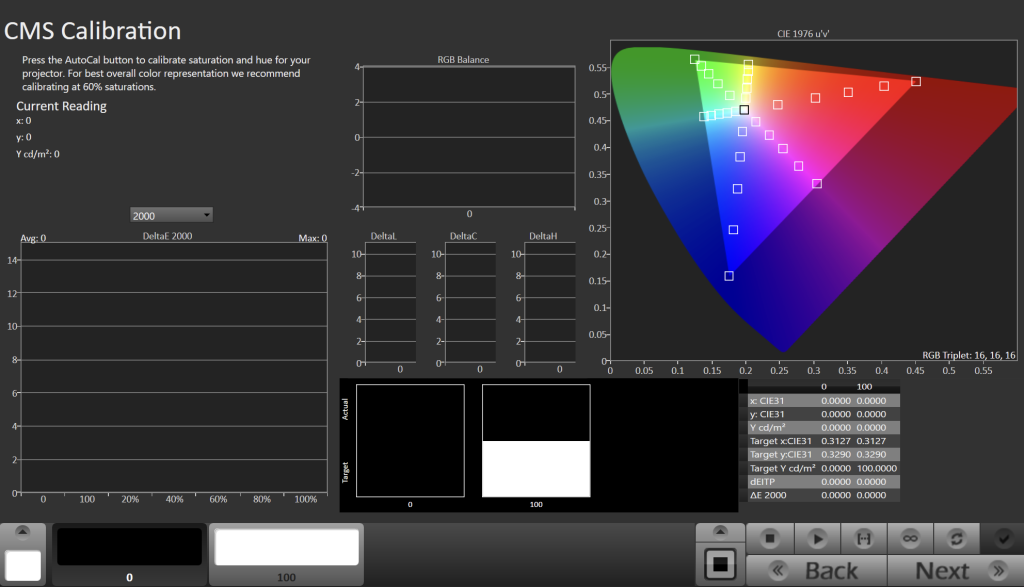
- When the AutoCal Process has been completed a summary dialog will be displayed
Step 6
Here Calman will verify your post-calibration results
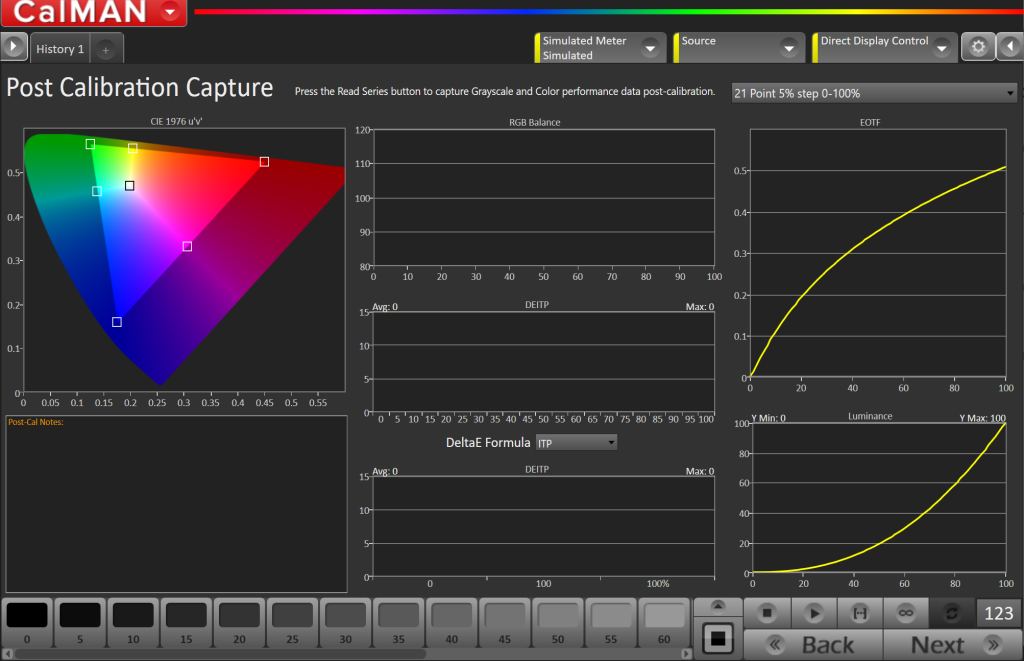
- Proceed to the Post-Calibration Verification page, at the end of the workflow
- Click Read Series […] button to take post-calibration readings
- Additional validation options are offered in the next step